Wednesday 30 April 2008

A Chip Off The Old Block


The walnut sandwich body has now been cut down to size.


I had to resort to buying a jigsaw to do this job as I would have been there for a very long time otherwise. The jisaw leaves a reasonably clean edge, but the blade can bend so the edges are not square.


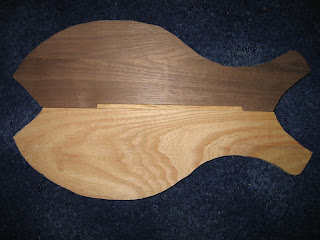
The photo shows how much was removed from the top left (where my arm would be sitting). Fortunately I am now quite happy with the new slimmed down shape and I prefer it to the original.


The next step is to cut out the holes in the body. The original design only had a cutout in the top part, but now to keep the guitar looking balanced, it is sporting holes in both upper and lower body halves. This is mostly done "just because I could", but also to keep the weight down a bit.


I didn't want to make a copy of an existing bass, but the more I looked and created at radical designs, the more I realised that a lot of the usual features are there for good reasons. The lower horn, for instance, needs to be cut away on the fboard side to allow access to upper frets (not that I get up there often...). The other side of the lower horn is shaped so that when playing the bass sitting down without a strap, it sits on my right leg and doesn't keep slipping away.


These large holes mean that there will be limited options when the time comes to fit volume controls, and the circuitry to animate the fboard will probably have to be located in the upper horn somewhere. No pain, no gain? Or fools rush in when all else are reading the newspaper?

Moving back to the neck, the trussrod fillet has been made from an offcut of the walnut. It has been shaped to complement the curve in the trussrod channel, and a groove cut in the top to allow it to fit snugly with the trussrod whilst giving more surface area for the glue that will be used to fix it in later.

Sunday 20 April 2008

Fit Form and Function


I have got enough of the main parts of the bass cut out and shaped now to give it a trial run. Assembly by double-sided tape and it is ready to go.


Smeg!


It is now quite clear that the top part is way too big. My playing style is finger based (as opposed to using a pick) and I tend to have the strap fairly short. I don't have enough joints in my wrist to cope with a the long strap look with the guitar down by my knees - although that does look a lot better and has attitude.


My right forearm rests on the top of the body, just over the bridge. The way I had cut out the body parts meant that this top piece was around 70mm higher up than my regular bass. I don't feel that this would have prevented normal play, but it certainly would have an detrimental effect on ease, comfort and ultimately endurance.


Now is the time to do something about it. I had designed the outline on a big sheet of paper and at the time it looked fine. I couldn't play the paper version. Now the form has started to impact the functionality and as an engineer the outward form has the lowest priority of the three - though I don't want it to look too home-made like a couple of bits of plywood and a rusty nail.


So it was back to the drawing board (well the floor actually, as my plans are full size and the coffee table is only big enough to support the remote controls). As I have already cut out the walnut sandwiches (the W-plan diet?) any redesigning can only remove material not add any extra.


Lots of pencilling-in and rubbing-out later the new version 3 design was completed. Freehand sketching with curves and stuff is not something that I'm used to, but I find that eventually the bold lines start to blend together and the balance between top and bottom body parts reveals itself. I have managed to shave 40mm off without losing the essence of the look I was striving for. This leaves me with 30mm extra which can be angled to suit my forearm and should make the difference a whole lot less noticeable.


I won't be seeing these whales again until they've lost some weight...


In the meantime I got round to carving some of the headstock detailing. It will still need a bit of fine tweaking at a later stage, but for now it is about right and the tuners fit into the holes properly. At least one end seems to be going OK...


Sunday 13 April 2008

Body Work

It is time to make a walnut sandwich. People that know me seem to think that I have a thing about food, but it is often no more than an unfortunate coincidence that I only ever see them at mealtimes. If they were to turn up at half past the hour they may look at me in a totally different light...


But enough about me.


As the neck is a combination of Wenge and Padauk (or WOPWOPOWPOW as I like to call it) I have gone for a body made from ash. Mostly it is because I like the large open grain pattern, but
I have heard it has pleasant acoustic properties and I'm always up for that too. I found a decent plank of it in my local timber merchants.


The ash measured about 10ft by 8in by 3/4in. This is not thick enough for a solid guitar body, so I need to laminate this to double its thickness. An ash to ash join would be fine, but not so aesthetically pleasing - which is where the walnut comes in.


The aforementioned timber merchant was visited again and a piece of 5ft by 4in by 1/2in walnut was found. This would result in a 2in thick guitar which is a little too chunky, so they managed to saw it down its length into two 1/4in thick planks. The sawmill operation cost practically nothing, but saved me a shed load of work.


The body shape had to be transferred from my full size sketch onto 'disposable' paper. This was then cut to make a template. The template was used to draw the outline on the ash. It is so much easier using a wood that shows a pencil mark.


As can be seen from the photo, ash is also very comfortable!


After passing the quality audit (!) the body shape was painstakingly sawn out of the wood using a coping saw. I was very glad at this point that it was only 3/4in thick. This is the upper part of the body.


Ash is definitely a hard wood and I snapped three blades whilst sawing out the four shapes (2 upper & 2 lower). Normal people would use a jigsaw or some other powered method of convenience, but I would only make bigger and quicker mistakes so I'll stick to the man-draulic ways for the time being.


The walnut was cut into sections, half-heartedly book-matched and glued to make a wider (approx 8in) piece. This had to be clamped together whilst being squashed flat.


There is no doubt that at this point, something in the room was as thick as two short planks.


Once dried this was glued to one of the ash body parts. The photo shows a lower part - the grain looks quite striking. It seems that attractive grain is synonymous with warping, so the back had to be planed flat before the walnut was attached.


Once dry, the walnut was cut to match the ash outline, using the coping saw once more. This was a doddle being only 1/4in, and then it was nearly ready for the other side.

I routed a groove (thanks Chris J - I've still got your router) so that pickup wires can be threaded through. This last pic shows the two parts just before the walnut sandwich is assembled. Ah - that reminds me - what time is it? Fish-pretzel time?


You should have seen the size of the one that got away...

Tuesday 1 April 2008

Phantom Powered

Following the success of the pacman LEDs, I carried on to the ghost. The photo shows the fboard hole at the 12 fret marker and the opal and tinted acrylic that will be fitted in there. To give my ghost some character, the eyes and mouth were cut out from the black static dissipative bag that some of the electronic parts were supplied in. This was easy to cut, is very thin and blocks the light much better than permanent marker pen.


Once it is all fitted together it almost disappears. When it is not needed, it isn't a distraction either. I don't think the sandpaper was important at the time, but it makes a nice backdrop.


To help iron out the last few bugs in the software it was handy to put it all together. The leds are held in with masking tape, paperclips, old tyres and mattresses etc just so the overall effect could be seen working. When it is off, it looks pretty much like a plain fboard.


When it is on 'dim' (ie battery power saving mode) the blue leds at frets 5,7,9,15,17 & 19 are dimly lit along with the top segment of the pacman and the very top of the ghost. The processor clock is slowed down to 32kHz and it is waiting for a button press to fire up properly.


Once the button is pressed the animation comes to life - it all blinks & flashes like it is playing a game. There are separate sequences for normal chomping, eating powerpills and even croaking it occasionally!


It really needs a video clip to do it justice...