But enough about me.
As the neck is a combination of Wenge and Padauk (or WOPWOPOWPOW as I like to call it) I have gone for a body made from ash. Mostly it is because I like the large open grain pattern, but
I have heard it has pleasant acoustic properties and I'm always up for that too. I found a decent plank of it in my local timber merchants.

The ash measured about 10ft by 8in by 3/4in. This is not thick enough for a solid guitar body, so I need to laminate this to double its thickness. An ash to ash join would be fine, but not so aesthetically pleasing - which is where the walnut comes in.
The aforementioned timber merchant was visited again and a piece of 5ft by 4in by 1/2in walnut was found. This would result in a 2in thick guitar which is a little too chunky, so they managed to saw it down its length into two 1/4in thick planks. The sawmill operation cost practically nothing, but saved me a shed load of work.

The body shape had to be transferred from my full size sketch onto 'disposable' paper. This was then cut to make a template. The template was used to draw the outline on the ash. It is so much easier using a wood that shows a pencil mark.
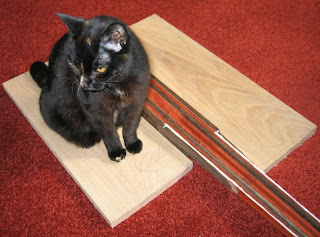
As can be seen from the photo, ash is also very comfortable!

After passing the quality audit (!) the body shape was painstakingly sawn out of the wood using a coping saw. I was very glad at this point that it was only 3/4in thick. This is the upper part of the body.
Ash is definitely a hard wood and I snapped three blades whilst sawing out the four shapes (2 upper & 2 lower). Normal people would use a jigsaw or some other powered method of convenience, but I would only make bigger and quicker mistakes so I'll stick to the man-draulic ways for the time being.

The walnut was cut into sections, half-heartedly book-matched and glued to make a wider (approx 8in) piece. This had to be clamped together whilst being squashed flat.
There is no doubt that at this point, something in the room was as thick as two short planks.
Once dried this was glued to one of the ash body parts. The photo shows a lower part - the grain looks quite striking. It seems that attractive grain is synonymous with warping, so the back had to be planed flat before the walnut was attached.
Once dry, the walnut was cut to match the ash outline, using the coping saw once more. This was a doddle being only 1/4in, and then it was nearly ready for the other side.
I routed a groove (thanks Chris J - I've still got your router) so that pickup wires can be threaded through. This last pic shows the two parts just before the walnut sandwich is assembled. Ah - that reminds me - what time is it? Fish-pretzel time?

You should have seen the size of the one that got away...

No comments:
Post a Comment