Showing posts with label neck pocket. Show all posts

Saturday, 1 December 2012

The Learning Curve

I put on four or five coats of bright orange spray paint and allowed it to dry for a few days. I then lightly sprayed two coats of glitter paint to give the flat orange colour some added sparkle before putting on another half-a-dozen coats of clear acrylic lacquer. The can said allow two weeks before using rubbing compound! It was looking really good, but it was a long wait before I could do anything else to it.

I was starting to get quite excited about nearly completing the bodywork. All this waiting for solvents to evaporate is quite tedious, but a necessary evil. During this fortnight I took the opportunity to see how the pickup fitted. I had to enlarge the hole in the centre to allow some space for the cables, and drill three fixing holes.

As the lacquer had dried to a bobbly finish, I got the wet'n'dry 1200 grade out to get the surface smooth again. I rinsed it down and set to work with 2500 grade. Definitely promising. Another rinse and out came the rubbing compound. A good dash of elbow grease later (rinse!) and I'm onto an old bottle of T-cut which will provide the final polish. Wow! It looked really shiny, but it has got a bit wet throughout the process. I was so pleased with the result, which was multiplied by the fact that I wouldn't be messing about with sandpaper, paint & polish any more. I shook the drips off and brought it back indoors to dry out as the garage gets a bit damp this time of year (especially when I'm throwing water about).

The next morning I noticed the central heating had stopped working. I did a bit of prodding about, and eventually it became apparent that the previously very noisy pump was now really really quiet. This is not a good sign. I went to work and took a detour on the way home to get a new C/H pump. All I had to do was isolate the valves each side of the pump and swap'em over. Of course, like any good soap opera, the ending can always be predicted. The valves were seized onto the pump, so the system had to be drained and the valves replaced. The new valves were fitted and then it became evident that they were shorter than the old ones. I looked online for 22mm / 1.5" BSP valves but no-one specifies how long they are! So the next day it was an early start off to B&Q for 7am, get some 22mm yorkshire style elbows and get the blowtorch on the go. Warmth by 8:45!

After the central heating escapade, my attention returned to the bass body, so I picked it up to admire my good work and congratulate myself on a cracking job when I did indeed notice some cracks appearing. I was understandably annoyed by this. The water I used to rinse the paintwork had soaked into the wood grain where it was exposed (neck joint, jack, pickup and screw holes) and caused it to swell in places. Capilliary action works incredibly well on maple (so it would seem) and there was little choice but to let it finish drying out and have to start remedial work. Gutted!


To minimise the risks of the same thing happening twice, I'm attacking the problem on different fronts. The bare wood has been given a diluted coating of PVA to seal it and the cracks have been filled with wood glue. I ought to spray the neck pocket with a coat of paint or two. The majority of initial sanding (400 grade?) will be done dry. If I have to resort to wet sanding later, then I'll use a damp cloth to remove most of the residue. Of course, once I get to the painting, I'll still have to wait two weeks for the lacquer to harden. I'm so impatient!


Saturday, 15 September 2012

More bodywork

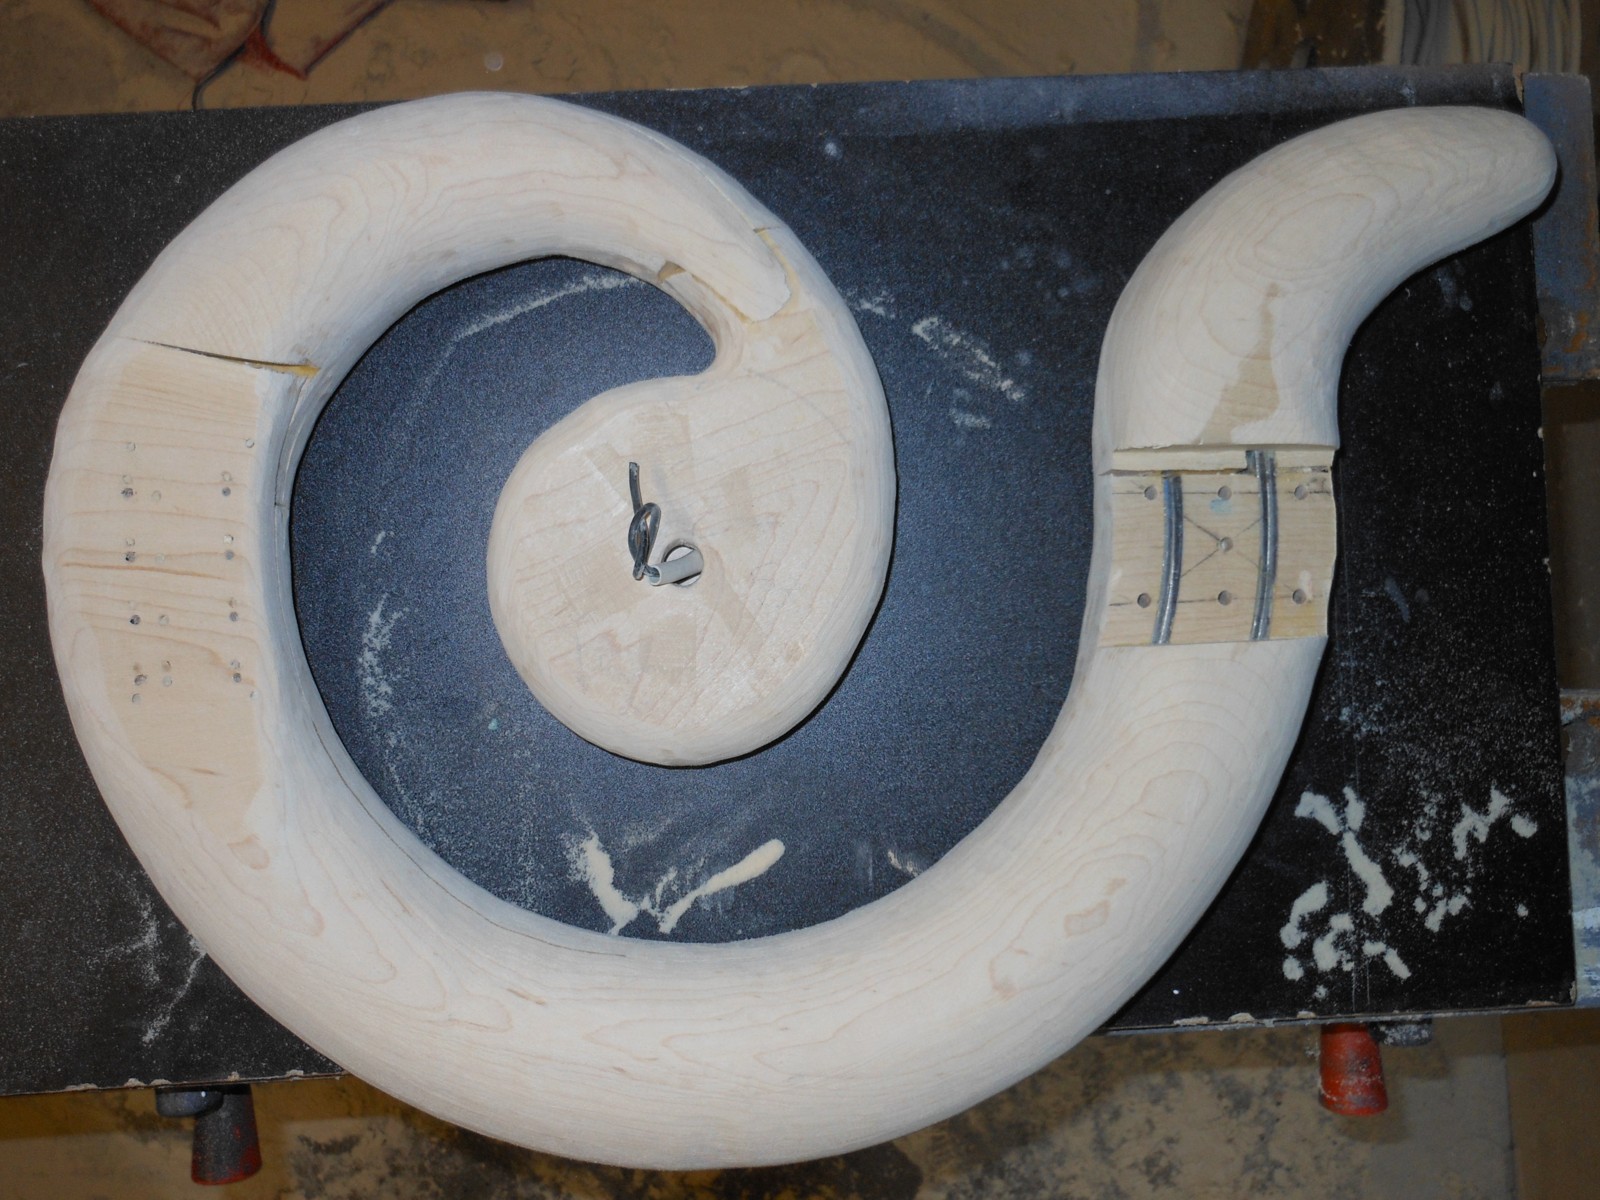
Creating the neck pocket took a while. The neck was carefully measured and the slot cut deliberately undersize with a saw. This was then whittled away with a chisel until the slot was *just* large enough to accept the neck heel. Six holes were drilled in the back so that the neck could be fixed securely. After that, it was time to assemble the basic bits to see if it would snap as soon as some string tension was wound in.


Fortunately, apart from an awful 20mm action height, it survived. I had aligned the bridge and neck etc so that the strings were centralised. As can be seen from the photo, this wasn't terribly successful. The string tension was sufficient to compress the 'C' shaped body and start to close it up a little. The E string was nearly off the f-board, whilst the G had more than enough space. The body bending is something I will just have to live with, so I allowed it to settle for a week before moving the bridge mounting holes down a few millimetres. I also took the time to remove some body wood from under the bridge to get the action down to about 3mm. Once refitted, the whole experience was more civilised...

This is the point where it could be played (acoustically) if only it fitted on my lap. It really needs a strap, but that will be one of the finishing touches. The other point is that the body alone weighs 3.7kg without any hardware! It feels much heavier than expected. The stainless steel reinforcement won't be seen once finished so I'll can try to convince people that it's filled with concrete...

Curves

Now that the whole will-it-snap possibility was sorted out, it was time to get rid of the blocky look. The maple body needed to be shaped which required the removal of quite a lot of wood. An orbital sander would not cut the mustard here. Some new toys had to be found - enter a DWT Swiss GS06-27LV Straight Grinder and a couple of Foredom Typhoon carbide burrs.


The body and neck were separated once more and the grinder was used to give the body a roundish cross section. Goggles, ear plugs & dust masks were the order of the day. The bridge and neck pocket areas have to remain flat and blocky, so the trick is to try and blend them in.

 
The rough shaped body is a great improvement over the slab look, but the process creates a huge amount of really fine sawdust. I made a dust castle in its own lunar landscape...


After the grinder had done the bulk of the work, there are several gouges and grooves which usually result from me using power tools. This time they were in the wood and not me, which I take as a good sign. Hand sanding with 60 grit paper is the first stage. It needs to look right at the end of this! I think it's going to be a long job, and I will also need to use some filler in places too. I foresee a lot more sanding ahead. Bored now...